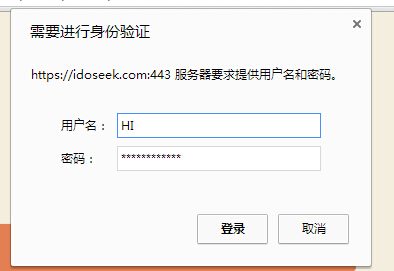
当不允许公开访问时一些网站路径时,比如网站后台密码,我们给利用Web服务器给路径加密认证,只用输入正确的用户名和密码才能进去访问。Apache有这样的功能,Nginx也可以。下面简单介绍Nginx给某些路径加密。
生成密码
方法一、用 Apache 的 htpasswd 工具来创建用户密码文件
使用htpasswd的前提是你已经安装apache。
|
1 2 |
# htpasswd -b -c filename username passwd Adding password for user ****** |
filename为创建好的文件,把这个文件放在无法通过WEB路径访问的目录下,在Nginx配置文件中给出这个文件的绝对路径地址 。username为用户名,passwd为密码。
方法二、使用perl 创建密码
考虑到安装了Nginx的用户未必安装Apache(httpd),如果只是为了生成个密码安装它,也未免有点大材小用。下面介绍用perl程序来生成密码。
创建程序:
|
1 |
# vim genpwd.pl |
写入如下内容:
|
1 2 3 4 |
#!/usr/bin/perl use strict; my $genpwd=$ARGV[0]; print crypt($genpwd,$genpwd)."\n"; |
给予可执行权限:
|
1 |
# chmod u+x genpwd.pl |
生成密码:
|
1 2 |
# ./genpwd.pl password papAq5PwY/QQM |
把输出的密码写入到一个密码文件中,格式如下:
|
1 |
用户名:加密生成的密码 |
一行一个账户。
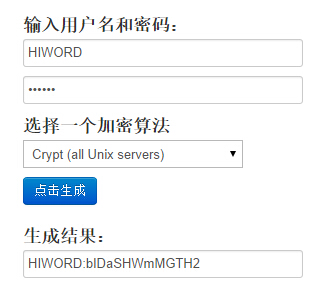
方法三:在线生成
使用开源中国社区提供的在线工具生成,比较方便。点击这里跳转
设置Nginx
如果使用了多域名虚拟主机配置对某个目录进行加密时,修改配置文件:
|
1 2 3 4 5 6 7 8 9 10 11 12 13 14 |
location / { root /data/www/domain.com; index index.php index.html index.htm; try_files $uri $uri/ /index.php?q=$uri&$args; location ~ ^/demo/book/.* { autoindex on; autoindex_exact_size off; autoindex_localtime on; charset utf-8,gbk,big5; auth_basic "Password Needed"; auth_basic_user_file /usr/local/nginx/vhosts/auth/authuser; } } |
“location ~ ^/demo/book/.* {…}”这样子可以禁止未使用密码时直接访问该目录下的文件,达到我们想要的效果。


